Documentation Index
Fetch the complete documentation index at: https://thenile.dev/docs/llms.txt
Use this file to discover all available pages before exploring further.
Install packages
npm install @niledatabase/server @niledatabase/client
Obtain Database Credentials
- If you haven’t signed up for Nile yet, sign up here and follow the steps to create a database.
- Navigate to Database Settings in your database’s UI at console.thenile.dev.
- Go to Connection settings.
- Select the CLI icon, and click Generate credentials
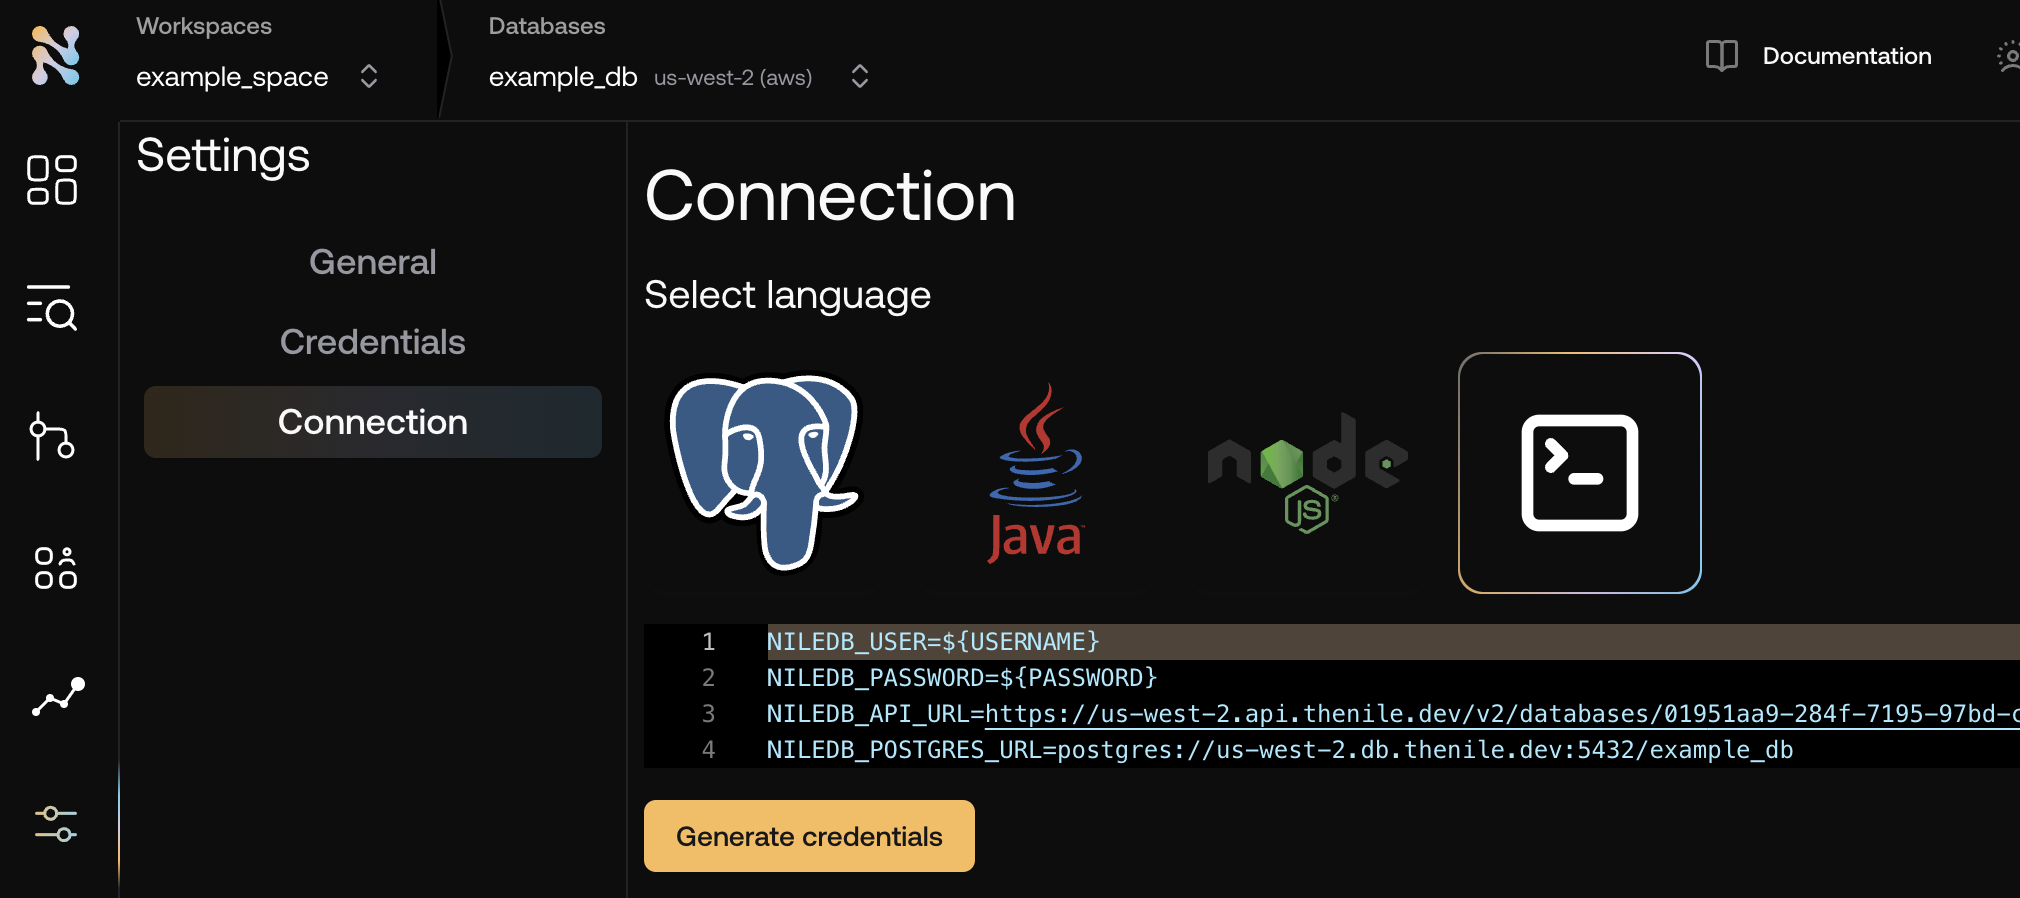
- Copy the required credentials and store them in an
.env file so they can be used in the application to connect to the Nile auth service.
NILEDB_USER=niledb_user
NILEDB_PASSWORD=niledb_password
NILEDB_API_URL=https://us-west-2.api.thenile.dev/v2/databases/<database_id>
NILEDB_POSTGRES_URL=postgres://us-west-2.db.thenile.dev:5432/<database_name>
Import and configure the nile-auth instance
import { Nile } from '@niledatabase/server';
import { nextJs } from '@niledatabase/nextjs';
export const nile = Nile({ extensions: [nextJs] });
To handle requests, set up a route handler on your server.// app/api/[...nile]/route.ts
import { nile } from "@/nile"; // path to nile instance
export const { POST, GET, DELETE, PUT } = nile.handlers;
Call APIs with the nile-auth client
import { getSession, signUp } from '@niledatabase/client'
With that, you’ve successfully set up nile-auth in your application.
Continue on to Social providers, or check out how to integrate into specific frameworks